Sunday, July 29, 2012

Some Paintings

For three weeks now, my art table has been covered with pastels, colored pencils, paint, my sketchbook, collage bits... I admit, I kind of what to sew something, but I have no place to do it. The table has been completely given over to Pages and Paint for the duration, so I can work on things in ten-minute increments if need be. Last week we moved out of the sketchbook and onto gessobords, which are pretty cool but unfortunately I can't find them locally. The ones I'm using here are 6x6 inches. (I can find really big, deeply cradled, $30 and up gessobords locally. Not so helpful!)

So last week we started off with a two-minute prompt game, which is also in Sarah's book. The idea is to help you approach a blank page, canvas, board, whatever--to start making a mark. All the prompts go into a bowl, you pull one out, set the timer (I used my new cell phone!) for two minutes, do what it says, and then repeat with another prompt. I struggled with this. Firstly, I am usually pretty loose when I go down there, because it's all play for me. It's not my job, and I approach this for what it is--fun--like I do with my kids. But this game seemed to shut that off. I think it was a combination of the timer, the precise directions, and the fact that some of the prompts just don't apply to me. Paint with a color I don't like? That one stumped me. And some of my favorite loose activities to do weren't included. The prompts are things that specifically work for Sarah, I'm guessing, and some worked for me and some didn't. I think I will use this "game" in the future when I need an entry point, but I will replace some of the prompts and add in some things I need to work on (leaving white space!) and some things I really enjoy (printing with found materials).

But anyway, this is the first "game" piece that I did.

"The Evolution of Useful Things"

I didn't add anything to this when I was finished "playing." Goodness, it's pretty full as it is.

This is another of the game pieces, but I added in a few more collage materials afterwards (which was a bonus assignment this week). I wasn't sure about this one at first, but it's growing on me.

"When Good is Better Than Best"
I think those gear-looking circles were added later too. I was trying to see how different pencil-type things would write over paint, and I did those with a graphite block, which worked much better than a regular pencil. Then right before I added in some of the extra collage pieces I went over the graphite with yellow oil pastel.

This last one was not a game piece. I wanted to incorporate a sketch I made of my daughter playing on the beach, and this is the result.

"A Day at the Beach"
I am still working on using collage materials--it just doesn't come naturally to me to layer in these different components, but I'm trying. In this one, the sails, bucket, sea shell, and the number "3" (my daughter's age, and what she calls "my number") are collaged in.

I am thinking I will have knitting to share in my next post. Meanwhile, I am managing to do some sort of art-making every day. Somebody mentioned in the class discussion group that it supposedly takes three weeks to set a habit, and we're there! That is an excellent thing, the habit of daily art-making, and one of the hoped-for results when I signed up for the class.

Thursday, July 26, 2012

Finished Knit: Fallberry {Filler} Mitts

My niece requested I post already, and she's right, it's a longer gap than usual. I've been spending my evenings, which is also my blog-posting time, downstairs painting the ugliest stuff ever. Okay, maybe not ever, but it's pretty blech. Our Pages + Paint assignment this week was to play the two-minute prompt game (if you have her book, Painted Pages, it's on page 18). I have my theories on why this isn't quite working out for me, but this post is about knitting.

Last week when I requested ideas on what to do with a skein of Socks That Rock Mediumweight, my sister suggested mitts. So I searched Ravelry for a free pattern for mitts using sport weight yarn, and I decided upon Fallberry. Then I realized I'd already queued up this pattern almost a year and a half ago. Well. Obviously it was time to knit them, and here they are.

All photos are, once again, taken by my ten-year-old, this time in a quick window of time with a dodgy background before it began raining again. (No real rain, just apathetic sprinkles, alas.) I wove in the ends this morning, giving me one knit-less evening before the Olympics begin tomorrow. (Just as well, I'm going to try to paint something that's not ugly tonight.)


I used US size 3s for these and did 2 1/2 repeats before beginning the thumb gusset, for a nice long-armed cuff. At the top, the pattern can only end at a certain point in the repeat, so I went for a little long rather than a little short. I can always turn down the tops, thusly:


I like that option with my mitts anyway, so I can turn them down to finagle car seat buckles and then flip them up so my fingers don't have to touch the steering wheel. The stitch pattern was easy and intuitive and I really, really like the end result. I knit most of these while watching the Tour de France finish up (what a great race this year; I'd watch it all over again).

I have enough yarn to make at least another pair--I forgot to weigh these before dunking them in the sink, and now they're wet and weighing will have to wait. (Socks That Rock has an odd, almost chemical-ish smell to me, I assume from the dyeing process. It's really bothersome and anything I make with it gets washed immediately. I have to wash my hands after knitting with it, too.) That second pair will go into the gift closet.

As for my lace project, I decided upon Luscious Lace Scarf. I'll cast on tomorrow. Is anyone else going to be doing any Olympic knitting? I'm not sure how much Olympics I'll actually watch, but I'm really hoping NBC shows us the bicycling events to help with my Tour withdrawal.

Sunday, July 22, 2012

Drawing + Painting

A little of what I've been up to this weekend, not counting the knitting, which will get its own post soon, I'm sure. Part of what is making Pages and Paint pretty cool for an online course is that it's the first one I've taken that includes snail mail. Before the course began, we each received a little packet in the mail with some odds and ends, plus an envelope to open each week. (That's 200 packets that had to be compiled and mailed out--whew!) One of the odds and ends was a snippet of fabric, and this week's bonus assignment was to get out the paints and try to re-create the pattern on the fabric. What a great idea! What fun!

So this was my attempt. First off, I'd have liked some black to mix with the blue and white, because that background is really more of a blue grey, but the supply list had the primaries and white, so I'm sticking to those for now. (But yeah, I'm going to have to use some black. I like shades as well as tints.) Second, I didn't reproduce the fabric exactly. Once I had the white circles (made with my fingertip), I mixed colors and added them as I pleased, more trying to get the spirit of the thing rather than the thing itself. (With a nod to Wallace Stevens.)

I had fun. Also, I really like mixing paints. I've said before, yes? I'm realizing that this is one of those things that I think is easy because I can do it (a common way in which I don't appreciate my own skills or talents: I think if I can do it, it must be easy). Many people are relating how they are struggling with mixing paint colors, so that is another benefit of this workshop--I do not recognize my strengths, mostly. And while I still think if I can do something, certainly anyone can learn to do it too (and I do think this is a skill, not a talent; it is entirely learn-able, and my kids can all mix colors with varying degrees of success because they have been given the paint and the opportunity to do so), I'm going to take a moment and appreciate my love of color and willingness to experiment with it.

Okay then. So after doing that assignment, I decided to vary the theme, and came up with this.

Earlier in the week we were told to play with text and different ways of writing it. I used some letter stencils and some letter stamps (which is what you see here). In this instance, I stamped on tissue paper and then glued it over the painted background--squares instead of circles, different color palette, but still a direct descendant of the fabric assignment. This is the text, which might be hard to read:I have spread my dreams under your feet/tread softly because you tread on my dreams.

They are the final lines of a poem by W. B. Yeats, "Aedh Wishes for the Cloths of Heaven." Would you like to take a minute to read it all? I'll wait.

Isn't it lovely? I'd written this fragment in one of my many notebooks a year or so ago, thinking I'd like to do something with it, something illustrative, with embroidery, clearly. And I moved on to other things, and forgot about it, and found the notebook while straightening up the studio the other day, and wanted to remember it again. (I need to get better at keeping all the ideas in one place.) I love poetry. You probably knew that already though.

One more picture for you. A couple of weeks ago, iHanna posted about mandalas, and she included a video. I watched the video, and not too long after began drawing one every night before bed in a small notebook. It's very soothing. I think it's perfect to do before bed. Here are some samples.

The one in the larger notebook was done one rainy afternoon when I thought I might interest my older kids in trying it if I sat and did one myself. They were only sort of interested, but that's okay. They may decide to try at some point. All it takes is paper, a fine-point marker, and patience.

And you? Did you find some time to be creative--or contemplative--this weekend?

Thursday, July 19, 2012

Pages + Paint: Sketchbook

I've only taken a few online courses, but Pages and Paint is my favorite so far of the ones I've tried, mainly because it is getting me inspired to do. Last week, Week One, was mainly about setting up our studios and inspiration board/wall. The kids and I already have a great place for art-making--it's not perfect (I'd love some natural light), but it's by far the best set-up we've had in this house and I'm so grateful for it. The walls are filled with works by the kids and me, studies we've done together using different materials, to inspire us as we work. But lately I'd been thinking I needed a section of the wall to hang up the odds and ends I've collected that I want to have out so I can see them. So that's done now.

But I just couldn't wait to get into that sketchbook! So last week, after spending a day at the local salt pond with the kids, when I wanted to remember some of what we'd seen, I combined words and sketch.


I think if you click on that to make it bigger, you might be able to read what I wrote, too. And yes! We saw a BIG horseshoe crab, and it was so so cool! There is nothing like seeing creatures in their natural habitat--while sharing their natural habitat. I can't even explain how it fills me up to be able to give these experiences to my kids.

Combining words and sketches in one journal/sketchbook was a revelation for me. I don't have to have a journal OR a sketchbook OR an art journal (the last, quite frankly, I find intimidating). I can put it all in one place. Obvious, I know, but it was something that needed to click for me. And all those photos I take (because I always have my camera with me) of random things that catch my eye? I can print them out--regular computer paper is fine--and stick them in the book.


Now, in Week Two, we are working in our sketchbooks as a class. One assignment was to make a double-page spread that felt "finished." Since I'm using an 8.5x11" sketchbook, I turned it sideways to do this.


The quote is from an e.e. cummings poem. Again, I think it'll be readable if you click on the photo. I was actually able to do this during the day (usually I get creative time at night). My boys were engrossed in their books, and my daughter was at the art table with me, working on her own composition, with crayons, stamps, and paint. Love working with her like that.

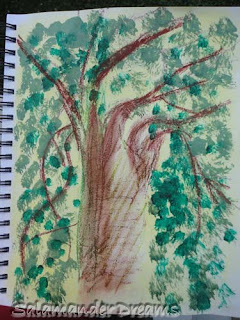
Also this week, we were given prompts. Mine was sunny*yellow*shady tree*try a sketch*happy. Because I'm trying to get more comfortable with materials I don't often use, I sketched this tree with chalk and oil pastels. The leaves were added with paint.


As a reference I used a photo of the enormous "fort tree" in a nearby park. I wanted to try approaching this prompt in a completely different way, too, so later I did this one.


This is more collage and mashing different things together, something that still feels so challenging to me. I think I drew here with conte crayons, which are always more chalky than I think they should be.

I'm excited about the "bonus" assignment for this week too...and that's what I mean about this course. It's got me doing. I'm really enjoying it.

Tuesday, July 17, 2012

Finished Knit: Long Saroyan (Two)

Remember this? (Project details here.)


Once I finished my Azami, this became my only knitting on the needles, which means it's done now. It's just about 90 inches long, so I lay it out on the floor so you can see: this long!


That wee bit of yarn underneath is all that's left over from a skein of Malabrigo Sock. I like how this pattern (Saroyan) allows me to use as much of the yarn as I can--and in the end I have a nice long skinny scarf that I can wrap around my neck a few times.

I took a photo outside, too, to show you how much the color changed within this skein.


When I started (the left) it was much more blue. By the time I ended, it was definitely heavier on the green. I like it. I bought the yarn because the colors reminded me of the ocean, and that's exactly what the beach water does, too--changes color.

And no, I didn't block it. I blocked my first one, and what a hassle, to try to block 90 inches worth of scarf. Where do you lay that out? And it didn't take anyway. Experience taught me that in this yarn, anyway, it's just going to curl no matter what. I don't mind. The leaf edging is like a sweet little secret. I know it's there. You might get a peek of it while I'm wearing it, just enough to make you think, hmm, there's a little something extra about that scarf....

But now I'm bereft, with empty needles. Completely unprepared. The Ravelympics Ravellenic Games (curious about the strike-through? Google will help) begins in ten days, and I was thinking I'd make something from this skein of lace weight (Aurora by Jill Draper Makes Stuff) because I have only knit in lace weight once and so yes, it would be a challenge.


I'm not sure what to knit with it though--any suggestions? Funny story about this yarn. I left the Squam Art Fair with no yarn--I know, none! I did have fiber, as a gift for my sister-who-spins. But no yarn. Then one of my cabin-mates wanted to go back for more of Jill Draper's yarn, and I offered to keep her company, and next thing you know she's whispering into my ear like the devil on the shoulder in cartoons, and I end up with a skein of lace weight, of all things. I'm fine with knitting lace; it's the lace weight yarn that crosses my eyes.

What I really need right now, though, is a project that will take no more than ten days--or that I'll be okay abandoning for a while in ten days--and uses yarn I already have. Any ideas for a skein of Socks That Rock Mediumweight? I have one left over from making baby sweaters. Really, truly, I need something to knit right now.

Sunday, July 15, 2012

A Better Zippered Pouch

The comments to my last post about zippered pouches had some really great links and advice, which is why I have two better zippered pouches to show off today.


These are sewn from cotton upholstery fabric liberated from my sister's stash. (She's moving and has to sell her house, so if you know anyone who wants to move to Middleboro, MA, and likes old sprawling houses, let me know.) (Also, I'm very, very sad she's moving even farther away. The fabric only helps a little.)

So anyway, it's a thicker cotton, and a sturdier-feeling pouch. Naomi shared this tutorial link, which helped immensely in two ways. Firstly, I added a line of machine topstitching on either side of the zipper, which easily and immediately elevated the pouch into something more polished. It also eliminates any sticky-zipper issues. Secondly, I followed the tutorial's helpful tips on pinning the outer-fabric side first and how to position the zipper teeth. Once the zipper is in and it's time to sew all the sides up, the whole thing is so bulky in the middle it doesn't lie flat, and I was struggling, on my own, with how to approach it. Yay for helpful tutorials and helpful commenters who direct you to them!

My three-year-old daughter claimed one of these as soon as she saw them. I decided the other one was a perfect new home for all those cards I was trying to squish into a too-small pouch.


This photo gives you a good view of the topstitching and how neatly the zipper lies now. Also you can see that I lined the pouch with the same fabric. I have a lot of it, and it just seems like it will put up with a lot of abuse. I really like it as a zippered pouch, but I'm out of zippers that match it (for now, anyway!). I think this fabric will also make a nice tote, so that's in the works, too. You know, eventually.

A couple of quick, unrelated things:

* After a bit of a break, I'm back at my other blog, too, because it's the best place to talk about any homeschooling/life-learning topics and activities. (I suspect it might be in transition for a bit.)

* I had my annual physical not too long ago, and I had him run another celiac panel, because last year my tTG number was falling but still not normal. This year it's about four points above the normal reference range, what the doctor called "not clinically significant." I'm really happy about this because I hope it means my body is just about healed from all the damage I unknowingly did to it.

Hope you had a great weekend! I expect I'll have some things to share this week from the Pages and Paint online workshop, which started out great last week.

Thursday, July 12, 2012

{How To} Sew a Quick + Easy Headband

Sewing headbands is addictive...

Since I sewed my first headband, I've made a few (ahem; quite a few) more for myself and my daughter. It took me a few tries to get the length and width just right, but once I did, I was off and running. I've sewn these on the machine and by hand; either way they are quick and easy gratification, and they keep my long, unruly (especially in the humidity of summer) hair off my face.

It's been a while since I shared a tutorial, and I thought it would be fun to show how I make these. I scanned in my adult template and child template as a Google doc. The child one is sized to fit my three-year-old daughter's head. The elastic makes it adjustable, but you may want to fiddle with the length or width a bit for an older child. (I aim to get the finished length to run from just behind one ear to just behind the other.) Just remember not to make the end openings any narrower than they are now, or it's just too hard to turn them right-side out. The templates are for half of one side of the headband--print them full size on 8.5x11 paper, but trace the outline against the fold of a larger sheet of paper. (Or you could cut two pieces and tape them in the center.) If this doesn't make sense, it should once you see the pics below. Okay, enough of the small details. Let’s get started!

For an adult headband, you’ll need enough fabric to cut out two pieces. A fat quarter is definitely enough. You could use two different prints and make it reversible. You could embroider your headband like I did with my denim one. Play around! You’ll also need about 5.5 inches of elastic (a little less for a child). I usually use woven, but the scrap I grabbed for this is knit. Take your full-size template and trace it onto your fabric. If you’re not fussy cutting (to get a particular part of the fabric onto your headband, like I did with the dogs here), just fold your fabric right sides together and trace, then cut out both pieces at once.


Sandwich your elastic on the inside. You can leave a little poking out the end.


Then pin your pieces together on three sides. Begin sewing (1/4” seam allowance) at the end without the elastic, but leave yourself a little room--a half inch or so--at the end. Otherwise, it’s really hard to turn it rightside out.


When you get to the end of the first long side, pivot and then sew back and forth over the elastic a couple of times.


Pivot and head down the second long side, being careful not to catch the elastic as you do.


Once you’ve sewn all three sides, turn it rightside out (grab hold of the end of the elastic to help you do this), then iron the seams flat. (You could press a bit before you turn, if you wanted to.) Fold the raw edges of the open side under and press.

Rather stained ironing board cover...
Tuck in the other end of the elastic and fit it to your head so it’s comfortable—not too tight, but not too loose, either. Then sew the opening shut, sandwiching the elastic inside. Again, go back and forth over the elastic a couple of times.

Pinned and ready to be sewn

You could topstitch all around if you want, but I never do. Here's this one all finished.


If you finish and realize the elastic isn’t quite right, no big deal. You can always adjust it. I made one too loose, so I just overlapped it and sewed it securely. I made one for my daughter much too tight, so I cut the elastic and inserted another piece to extend it, again, sewing it securely.

Finished headband--the modeled shot! So quick and easy, pretty and useful. So much to love in one little project.

Goofy self-portrait, so you can see it on.
Shared with my creative space...

Monday, July 9, 2012

Longstitch Leather Journal

This month's Whimseybox contained an 8.5x11" scrap of suede leather, a packet of metal studs, and a link to download instructions for a studded leather wallet. Sadly (to me, anyway), Whimseybox is moving away from a box of random, fun, open-ended craft supplies and towards a project-in-a-box, based on feedback they've received. But they are still encouraging people to use the materials for whatever they want, too. (Not like they could stop anyone--but they are encouraging people to share what they make with the box supplies, regardless of whether they make the intended project.) I have no idea what I might do with a packet of metal studs (anyone want 'em?), but I decided the scrap of suede meant I could try out this longstitch bookbinding tutorial at Tortagialla: The Blog.

And here is the finished result.


It kinda makes me want to squeal with glee, to be honest. After I finished it (and it was a two-day process; more on that in a minute), I came upstairs and was all, LOOK WHAT I MADE!! Even to the kids, who were suitably impressed--as I am with their creations, so it's only fair.

Anyway, you may know this about me by now, but one of my favorite parts of a project is figuring out solutions to design problems. If you clicked over to Linda's tutorial (and you should, really), you'll see that hers has a flap from back to front to hold the book together. This piece of suede was soft and floppy, so it needed some sort of closure, but there wasn't enough for a whole flap like that. Since it started out the size of a sheet of letter paper, I decided to cut paper in half and fold those half-sheets in half to make the signatures. This meant I could trim a two-inch strip of suede, and I used about six inches of that for the closure strap.

Once I had that strip, though, and I tried to put a needle through it, I realized that wasn't going to work. There's a reason that shoemaker in the fairy tale is always banging away. I looked at the bookbinding supplies on my art table and realized I had the answer right in front of me--my bookbinding awl. I lined the strip up on the back of the larger piece and banged through both pieces at once to make sewing holes. Then I sewed them together.


That all took a bit of time, and was noisy, too. Once that was done, I could glue a piece of cardstock to the suede piece, as Linda suggests, to give it a bit more sturdiness. Then I had to let it dry overnight which was really, really hard. That was Saturday night. Sunday we went to the beach and part of me just couldn't wait to get home and finish up the book; that had to wait until after dinner, though.

Following the tutorial, I sewed in the signatures. I did three, and I could probably add a fourth (nothing's stopping me...I can add to the book at any time; isn't that kind of cool?). This is what the binding looks like.


I used the linen bookbinding thread I had in my my box of bookbinding supplies. It's a little thin against the suede but hey, not bad for experimenting. This is what the inside looks like.


I used some sketch paper from an inexpensive sketch pad that was on the paper shelf. It's heavier than printer paper and a little rougher. I wonder what I'll use this book for?

Back to the first picture so I can tell you about the closure...


I'd originally planned to use a button. I tested this by cutting a slit in a scrap piece of suede and making sure I could get a button through it. But once the button was sewn on--accomplished by banging two more holes through the suede and its cardstock backing--I couldn't maneuver the button through the slit. There wasn't enough wiggle room. So I rummaged through my button jar for a toggle. That's why the slit is a little bigger than it needs to be, and not as neat as it could be--I'd already cut it to fit the button. But for an on-the-fly solution to finagling a closure given the materials at hand, I'm pretty pleased. And I used almost every bit of the leather that I received.

Ha! Look what I made! We have a shoe repair shop in town....I'm wondering if they ever have scraps of leather they're looking to get rid of??

Sunday, July 8, 2012

July


I have so many ideas zinging around my head, and so many things I want to share and show...in time. My goals for July? Because I have been keeping up with setting monthly goals.... June's was to spend less time on the computer during the day, and I'm continuing with that goal into July (which is why all my posting is done in the evening lately). It seems I will soon be entering this century when it comes to cell phones...having stubbornly resisted anything smarter than a flip phone that merely makes and receives calls--and, annoyingly, receives texts even when I don't want them, because they're not included in my plan, and I have no idea how to return them--I have now agreed to a smarter phone and a better cell plan.

My attachment to which phone is nonexistent; my husband is in charge of that because I don't care. I tell him what I'll use it for, and he does the research, which he enjoys and I do not. I can see how having a phone that checks email will enable me to spend less time on the computer--a good thing--and that it could be handy to text here and there, especially when my husband is traveling. As long as I remember to treat the phone as just a phone when I'm out in the world, I think I'll be okay with being dragged into the world of pocket technology. I don't want to have my face in a screen all the time. So.

Other goals for July? At least one beach day per week--and think of that, a whole day set aside to just sit and be, to play in the sand and water with the kids, read a little, find sweet little shells and stones... I am deliciously unbusy this summer, as much as possible. I've signed the kids up for nothing. Our days are our own. Day trips, beach days, days spent lolling around in the yard...

They read cuz they want to. Yay!
I've signed myself up for Pages and Paint, which starts tomorrow and is at cross-purposes with my no-computer-during-the-day goal, since new posts go up in the morning. I just have to remind myself, the point of an online workshop is that it is there and waiting for me, not the other way around. I can wait until nighttime to see what goodies Sarah has for us that day.

This week, I hope to have a tutorial ready to share--it's been awhile since I've done one of those. I want to show you what I made with this month's Whimseybox supplies. And there are some good links to zipper advice in the comments section of the last post; I have more fabric cut and just need to clear the art table off so I can set up the sewing machine again.

Today, though, we spent the day at the beach (again), where I found that sweet little piece of polished clam shell--I love those small bits of shell, tossed around by the ocean until they're perfectly smooth. This is a piece of the hinge, just the right shape to show how I feel about spending my day where the ocean meets the land.

Thursday, July 5, 2012

Scratching the Itch: Zippered Pouches

Do you ever get it into your head to make something in particular, and then there's just no getting it out of your head until you do? Some time last week I decided I wanted to make little zippered pouches, to have on hand for gift-giving or just plain spontaneous generosity, not to mention I'd like a new one too. I'm not sure exactly where this idea came from. It might have been while I was trying to jam everything back into the small zippered pouch I use as a wallet. It's only a tad bit bigger than the size of a credit card, and I have so many cards that size stuck in there. It's fine to slip one or two out, but if I have to take them all out to look for something, it's really hard to get them all back in again.

Geez, I thought, I should just make my own. I might have had that idea while flipping through my copy of Sew What! Bags for fun one night (you do that too, right? just look through project books for fun?). There's a recipe in there for a wristlet, with the idea of modifying it to make a small zippered pouch. But where to get short zippers? I don't remember seeing them in Joann's. Etsy to the rescue! I ordered ten 5-inch zippers from zipit. With shipping I think they cost about sixty cents each. While I waited for them to arrive I cut 6.5" by 4.5" pieces from scraps, enough to make four pockets to start with. I chose plain outer fabrics (linen and scraps from an old, soft button-down shirt) so I could stamp them.

Clockwise from top left: Birch leaf; Irish moss; winter tree; summer tree.
A bit wonky in places, but cute! So cute!! They are just under 4x6 inches, and they are lined, of course. (They all have the same lining.)


So, I am still not great at zippers. My side seams don't line up exactly, and I don't seem to understand how the zipper foot helps anything, really, and I feel like I am actually sewing too close to the zipper, so the lining fabric tends to get stuck--especially in the one with the seaweed print (top right), where it really does get too close to the teeth in one spot. But yet, it also feels like too small of a seam allowance with the fabric. Maybe I shouldn't line the top of the zipper up exactly with the top of the fabric before sewing. If I position it down just a little bit so the stitching isn't so close to the top edge of the fabric, would that be a bad thing? Anyone have zipper-sewing tips to share?

Luckily, I have six more little zippers with which to experiment, and I know where to get more--in so many sizes and so many colors! Is it weird to feel like a kid in a toy store when faced with all those zippers?

Any creative urges just been nagging at you lately?

Linking up with my creative space...

Wednesday, July 4, 2012

Postcard Winners

Just a quickie post today to announce that my daughter put all your names into her hat...

Do what you like. Like what you do. Words to live by!

and pulled out two names.

Cute little hand + foot!
Congratulations to Victoria and Lamina! You all left such nice comments, I wish I could send you all postcards. Victoria mentioned she'd been missing the Northeast and its seasons lately, and I hope these postcards feel like a bit of home to her. And Lamina, so you know, is currently hosting a giveaway of her own--two gorgeous little zippered pouches.

Now I'm off to stare at the weather map and try and figure out if my boys will get to see fireworks tonight...Happy 4th to my American friends!

Tuesday, July 3, 2012

Finished Knit: Azami

Oh, boy. I started this sometime in May. Several times, I started it. I finished it this morning, and my ten-year-old agreeably came outside to take photos for me. He doesn't even ask why or anything.

I really like this pattern (Azami by Carol Feller). I really hate this yarn (Southwick by Valley Yarns, which is Webs' house brand). This is disappointing, because I almost never use the exact yarn called for in a pattern, but I wanted to do this sweater right, so I decided to order the Southwick. It seems like a mismatch between yarn and pattern to me. Plenty of people love this yarn, and I am admittedly biased towards wool and wool blends, although I've knit with cotton and linen before and enjoyed some of those yarns very much. But I found this to be slippery, splitty, and extremely unforgiving. Picked-up stitches look like, well, crap. I also fear the yarn won't wear well, since the yarn I unraveled (sigh, I had to do this quite a bit) looked shabby just from one knit and redo. It is so frustrating to spend lots of time on a project and end up disappointed in the materials, especially when using the suggested materials. I wish I'd subbed.

But, you know, moving on. Here's a shot of the back, so you can see the hood.

(Didn't my son do a great job? He asked me how to zoom the camera and this is his original shot, no cropping on my part.) I made the hood a little shorter than called for, because I think this yarn is going to grow. Yes, I swatched, but I didn't swatch and soak and hang and beat the heck out of it to see if it would turn into some other fabric entirely. I think it might, though.

As for details, this is the 32.5" size with no waist shaping. I originally began the next size up, but when I pulled it out after one of my numerous errors (I forgot to switch to stockinette after completing the first lace repeat), it looked enormous around. I don't have as much waist as I used to, and I thought the fabric was clingy enough without adding in shaping. It's all a moot point because this is probably going to pill within four wearings. So it's a good thing my son took such nice photos...

Sunday, July 1, 2012

Mixed Media {Intensive}

"Intensive" is the right word! I am exhausted, but in a good way--Saturday and Sunday I drove back and forth to Providence for six hours of class each day in mixed media, taught by Mara Metcalf, who was completely down-to-earth and welcoming, funny and approachable. The class contained a good mix of people with varying skills, experience, and backgrounds, and I'm betting not one person there felt they didn't belong. Taking an Art Class can feel pretty intimidating, especially at a place like RISD. Honestly? I've gotten over that. I've taken classes there myself, although it was a long, long time ago, and always through continuing ed; plus, I have an art minor in my background, so I no longer feel that Art Classes (capitals intended) are for Other People But Not Me. But continuing ed, truly, should be open to everybody. I think that's the idea of those programs, yes? And Mara was such an easygoing, natural teacher. I think it would be a good use of my time simply to look for more classes by her and try to take them, no matter the subject.

But what did we do, you're asking. Enough of the preamble! Basically, we messed around. Some people had an idea coming in, but I had none. I find mixed media challenging. Why? It has no rules! Anything goes! And I think that is exactly what challenges me. When I had the opportunity to pursue an art minor, I focused in photography. It had a nice rigid framework that I could experiment within, and boundaries to push against, but rules aplenty. You had to know the rules (of exposure, and chemicals, and development) so you could experiment with them. Wide-open-go-anywhere-do-anything-use-anything is hard. It is hard for me to just let loose.

This is what I ended up with after the first day.


We practiced with gesso and packing tape transfer. I'm familiar with the tape method (it's how I made this label, among others), and I'd seen the gesso transfer technique demonstrated during last spring's printmaking class, although I hadn't done it myself. (You can Google "gesso transfer" and get lots of instructive links.) So these three are a mix of transfer methods, collage, adding into the transfers with various materials...just playing around.

Sunday we were supposed to be a bit more directed. I didn't really have a plan, although Saturday night I did another gesso transfer onto prepainted paper, and another packing tape transfer, except I used contact paper instead, which is much less shiny and can be cut to the size of the image, instead of overlapping the strips of tape. I used both of those in Sunday's projects, which you can see here, pinned to the wall next to Karen's.


Karen's are the three on the left. Mine are on the right. First a close-up of the bottom one.


Talk about not having a plan! Not a one, beyond using the gesso transfer of the iris and the image of the girl, which is from a vintage sewing pattern envelope. (Hat tip to my sister, who provided the vintage sewing patterns!) And then I just winged it. There's some tissue from a sewing pattern, and some actual thread stitching, and some extra yellow glaze. Some marker lines that sort of mimic stitching, and finally, because the flower was sort of getting lost, I went in with some paint based on suggestions from Mara and a classmate. And then, you know, we all thought it more or less worked. (As an aside, I love mixing paint colors using only primaries, black, and white. I know there are a gazillion colors of paint available, and still, I almost always choose to mix my own. Love.)

The larger piece incorporates the contact paper transfer of a tree photograph...here's a detail shot.

Because I didn't think to take a close-up while it was on the wall, this has a bit of shadow and glare on it. I painted the underlying paper a yellowish green, then painted the dark green of the tree's leaves directly onto the contact paper transfer. You'll just have to believe me that this looks much better in person. The photo is one I took a month or two ago of a huge tree near one of the playgrounds we visit. It's one of those trees that spread out and the leaves fall all around you, and you can walk right under and it's like a play fort (especially if you're a kid) or a hideout (ahem, teenagers, it's not as private as you think), and the light is just magical in there. And then the tree has all these carvings on it. So I took reference photos both of the leaves surrounding you when you're inside, and the textual qualities of the bark, because these will, I suspect, show up as embroidery sooner or later. That's the plan, if I can clear the decks of all the other projects swirling in my head or on my work table.

And that right there is why I think mixed media might be a good solution for me. I like to do so much--paint and carve stamps and embroider--on so many surfaces--paper and cloth and canvas--that perhaps if I find a way to just combine it all together, I could get more ideas out of my head and into the world. And yes, I do stop to think to myself, What am I going to do with all this? I'm paying to take classes, so, to what purpose? Because we adults do tend to think we need to justify ourselves. But I'd never question my children that way. I'd never say, What are you going to do with that drawing, anyway? So the answer, for now, is that I simply need to do. I need to create.

And that is the other benefit of taking this class...time with other people who feel the same way. After class on Saturday Karen and I hung out for a bit and had dinner together. Those opportunities, for me, are few and far between, and rarely do I feel like I can completely be myself, because my self is kind of weird and a little awkward, but I felt completely comfortable around Karen, and in the class, too. And now I should go write down all the half-baked ideas swirling in my head before I forget them. I'll be back in a few days, hopefully with a finished project; meanwhile, the postcard giveaway is still open to comments until Tuesday night.

How was your weekend?!